Why to change the sights?
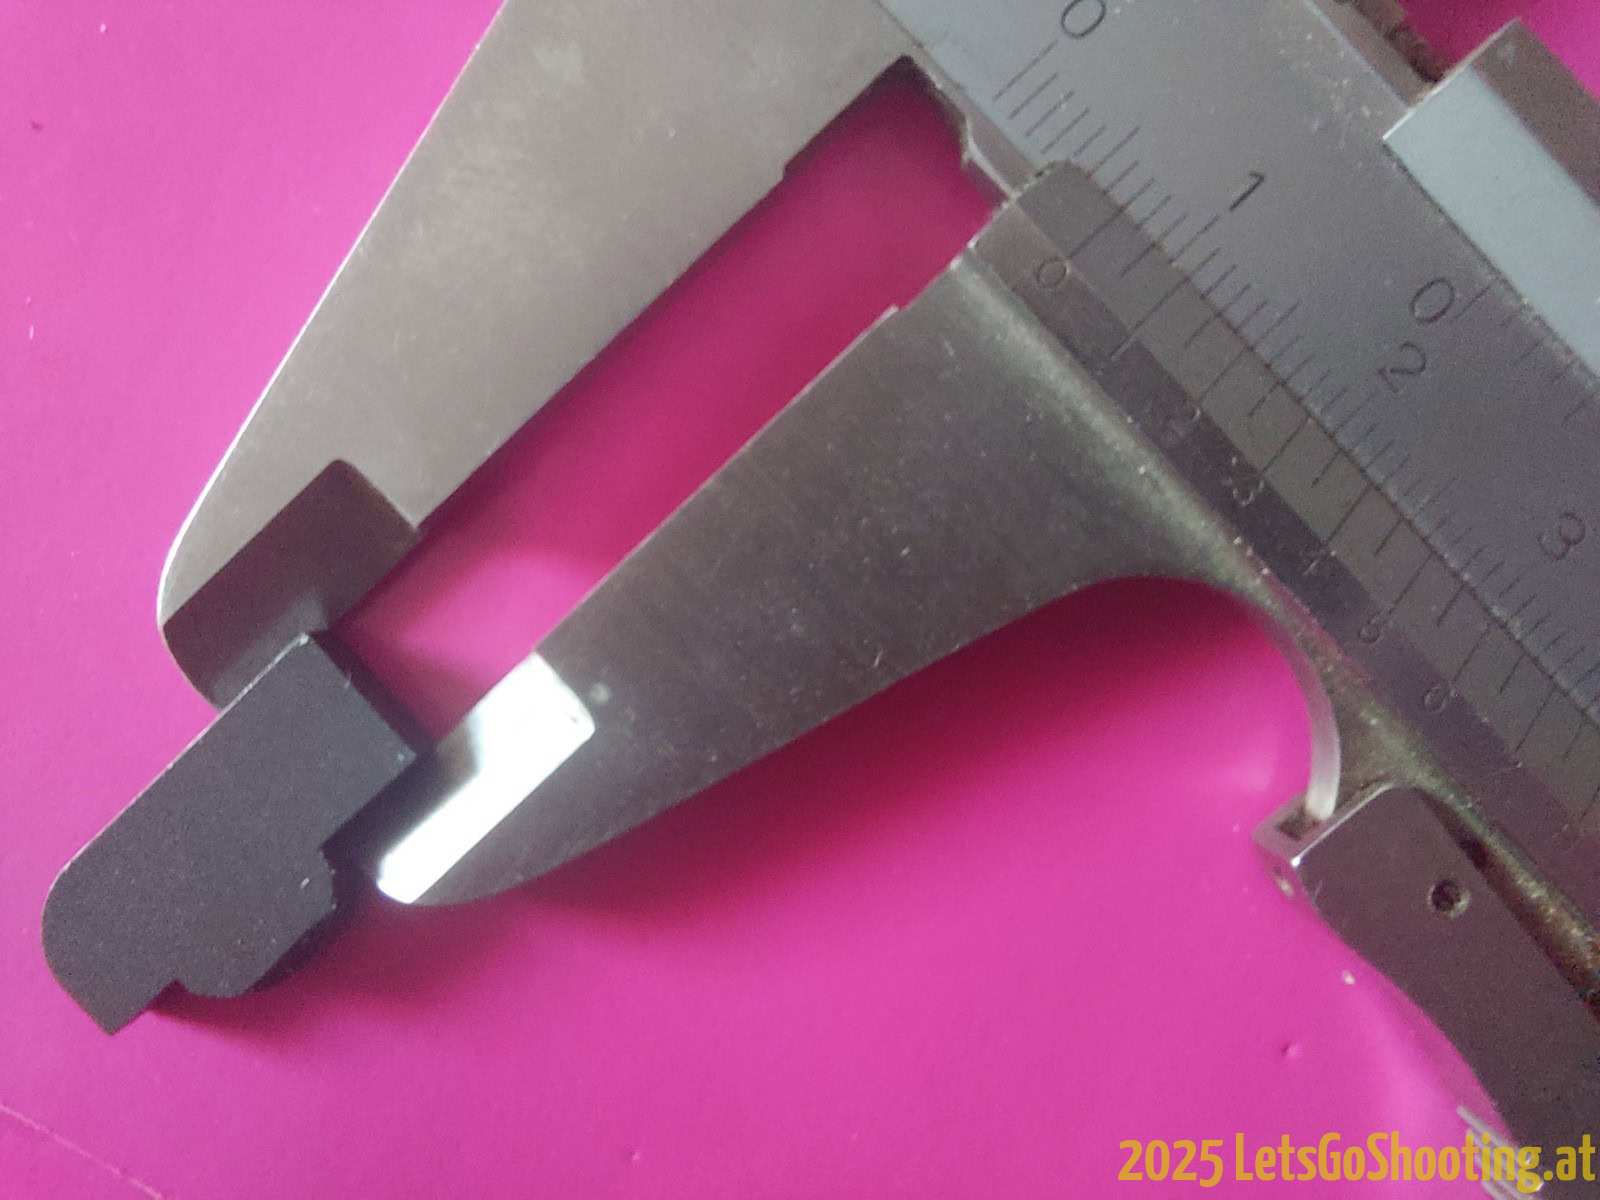
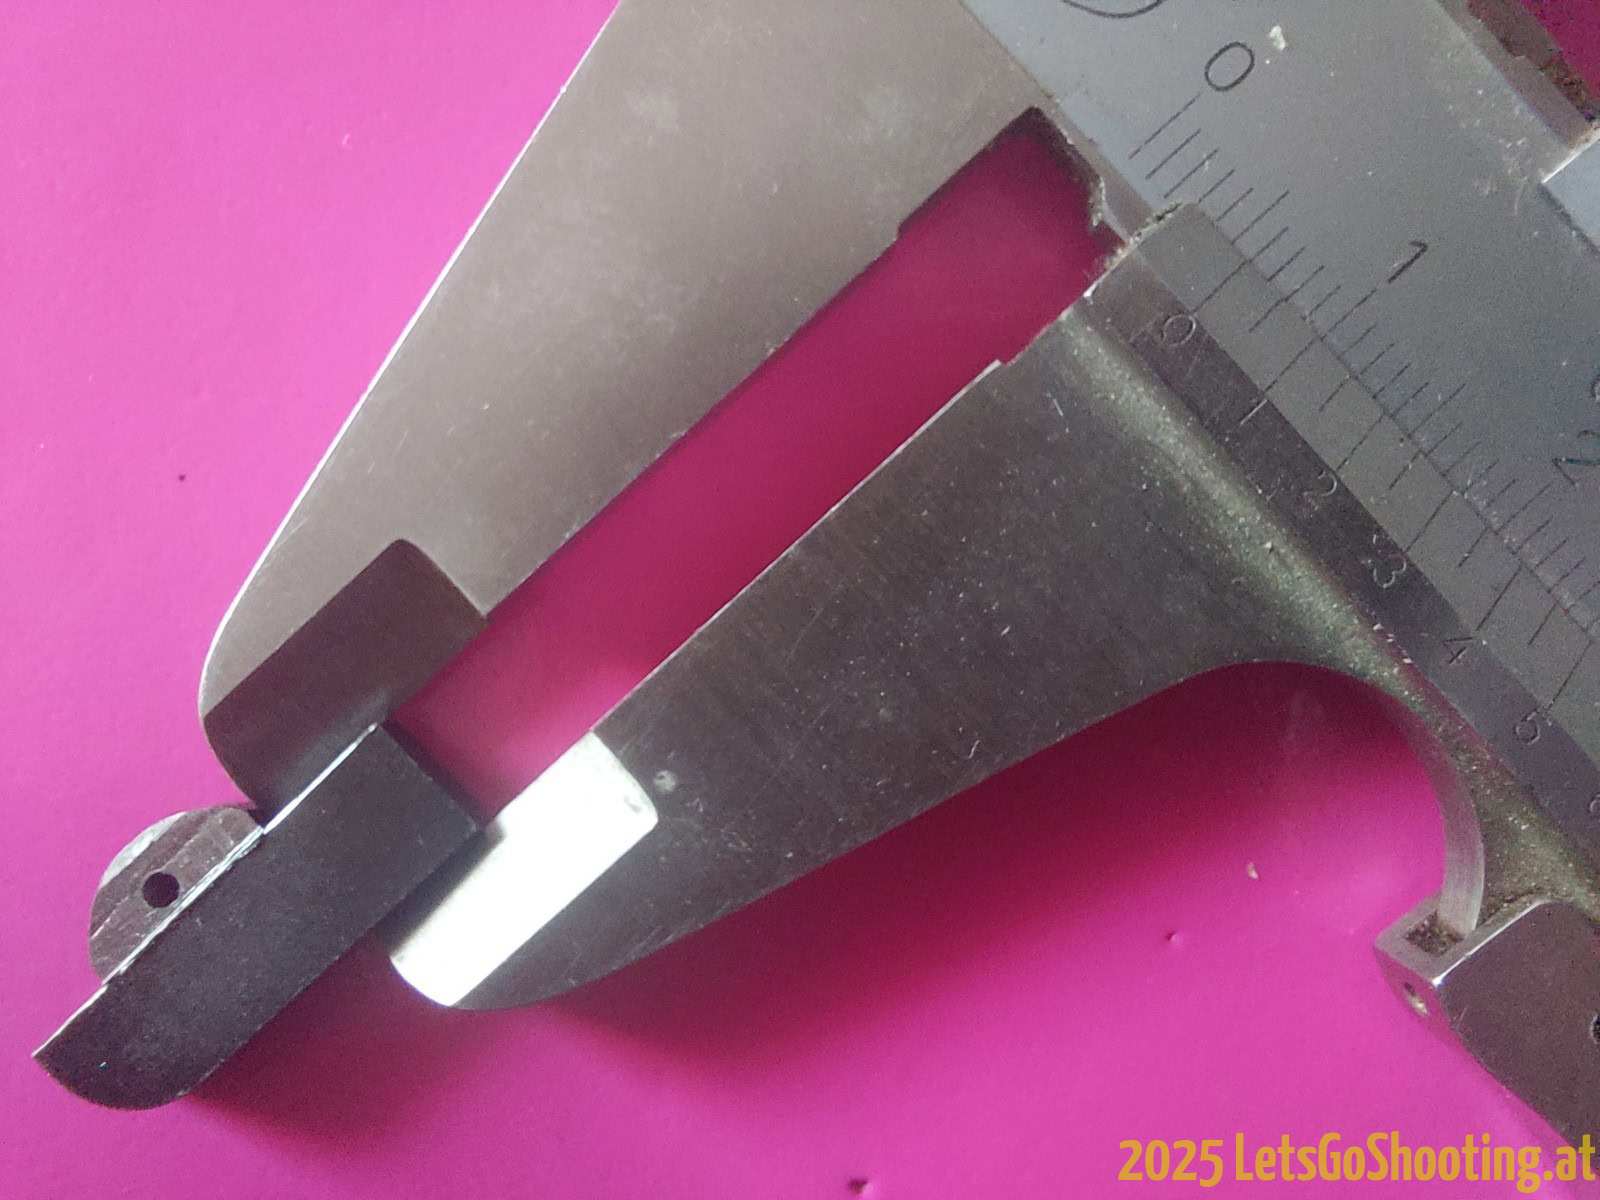
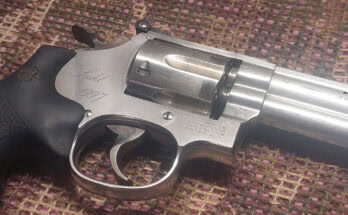
The S&W 686 Target Champion will be delivered with a small front sight, height about 6mm, for precision shooting.
So, there was no way to aim and shot „center“ without changing the front sight to a higher one.
You need …
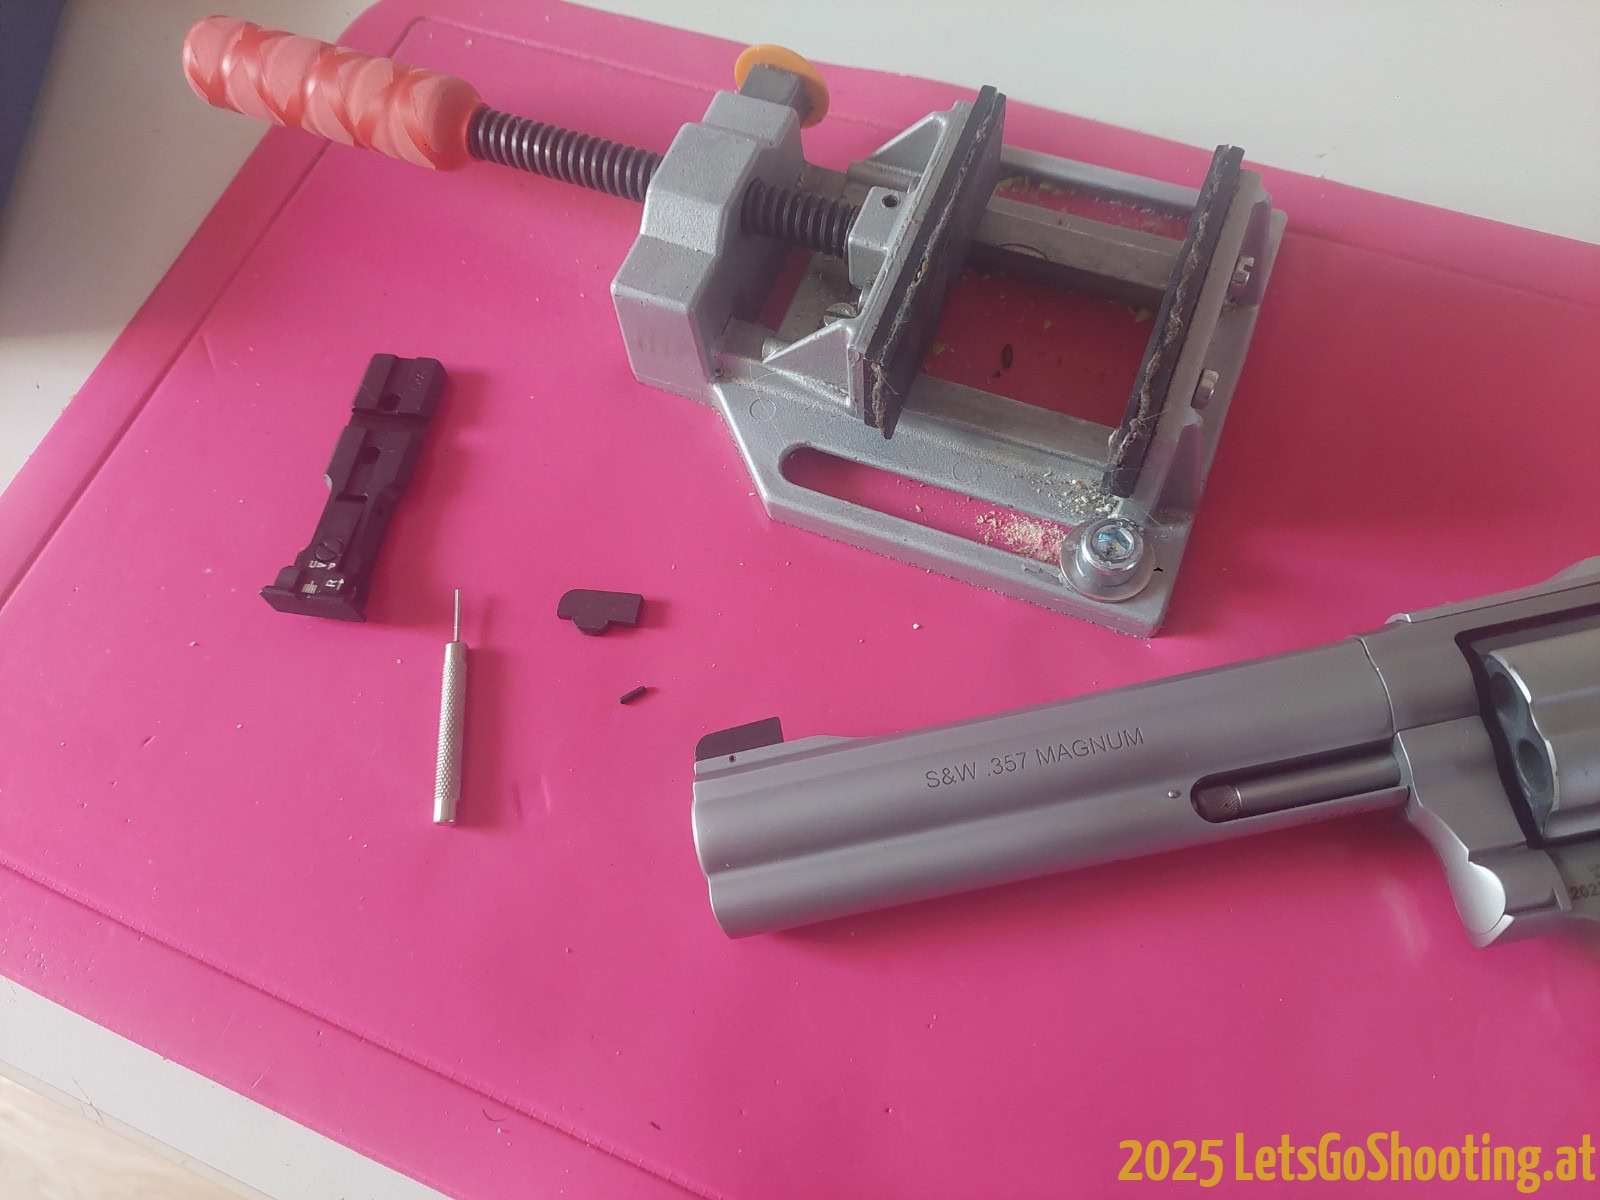
- a punch, diameter less than 1.5mm
- a hammer
- a flat-head screwdriver, medium size
- a drill, diameter 1.5mm ( I used one with 1.4mm diameter )
- a drill machine
- a vice
- a small piece of wood
And, off-course, a S&W 686 as well as new sights are also very recommended 😉
Let’s start with the Smith & Wesson 686 Target Champion front sight
First you need to remove the pin of the sight, use a small punch, it’s an easy operation 😉
The next thing to remove is the front sight. It fits very tight, so you maybe need a little bit of force, use the hammer and the piece of wood and be carefull.
After that, you can install the new front sight, which will fit also very tight, so the hammer and wood will give you a little help, too.

Maybe it’s not necessary to use the pin ( which holds the front sight in place ), but I haven’t tried it and installed a new pin, as well.
To do this, you need to thrill a hole into the new sight, so make sure the sight stays on its correct place when drilling ( use a vice or similar for this )
I used a drill with a light smaller diameter than the original hole, 1.4mm diameter works well.

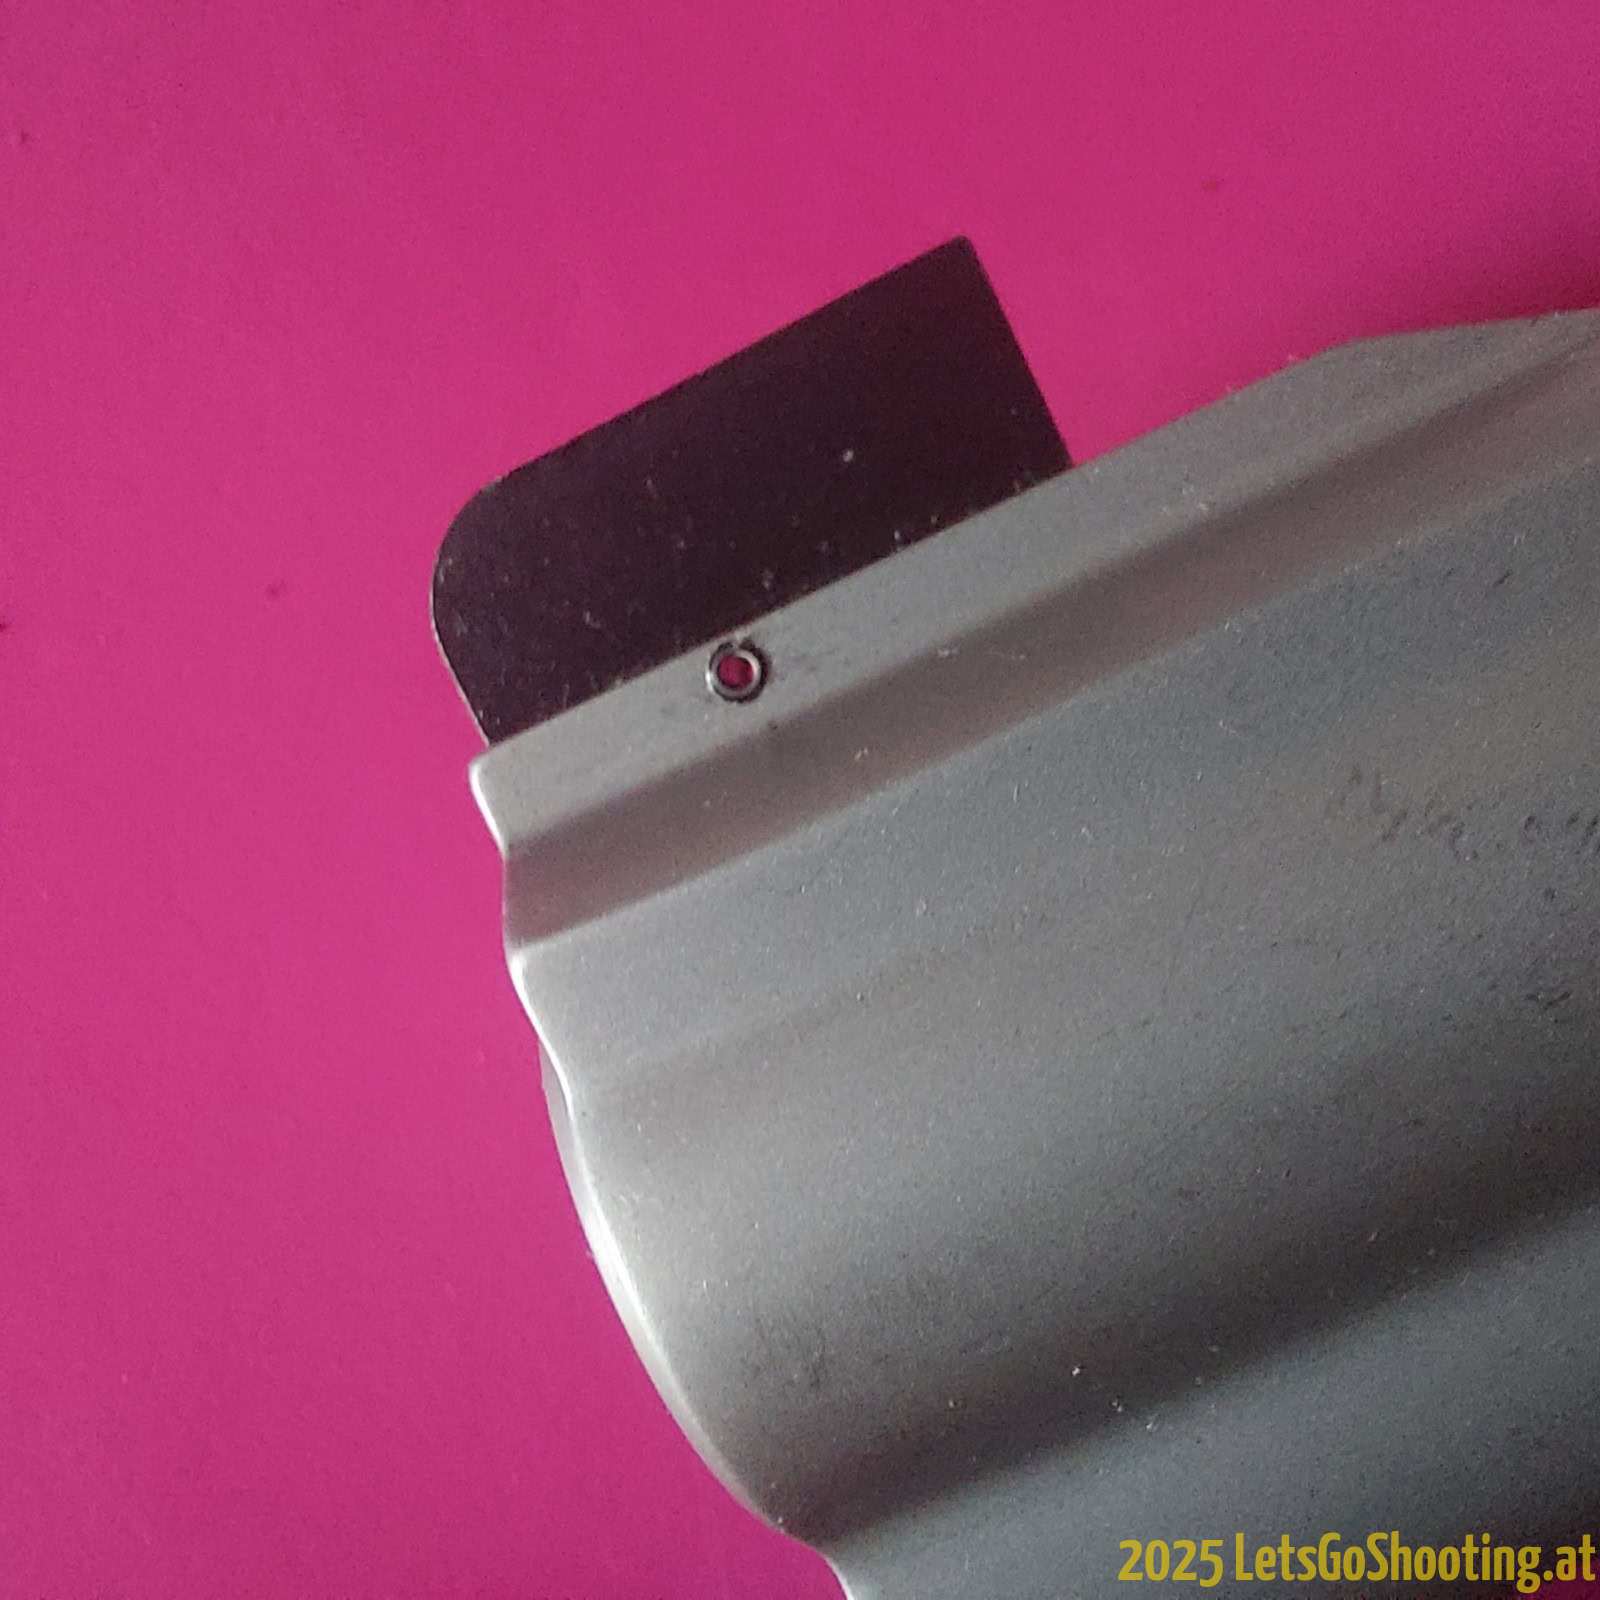
Then install the pin, use a new one or the original pin, as I did.
That’s all for the front sight, ain’t a big deal for installing it, uh?
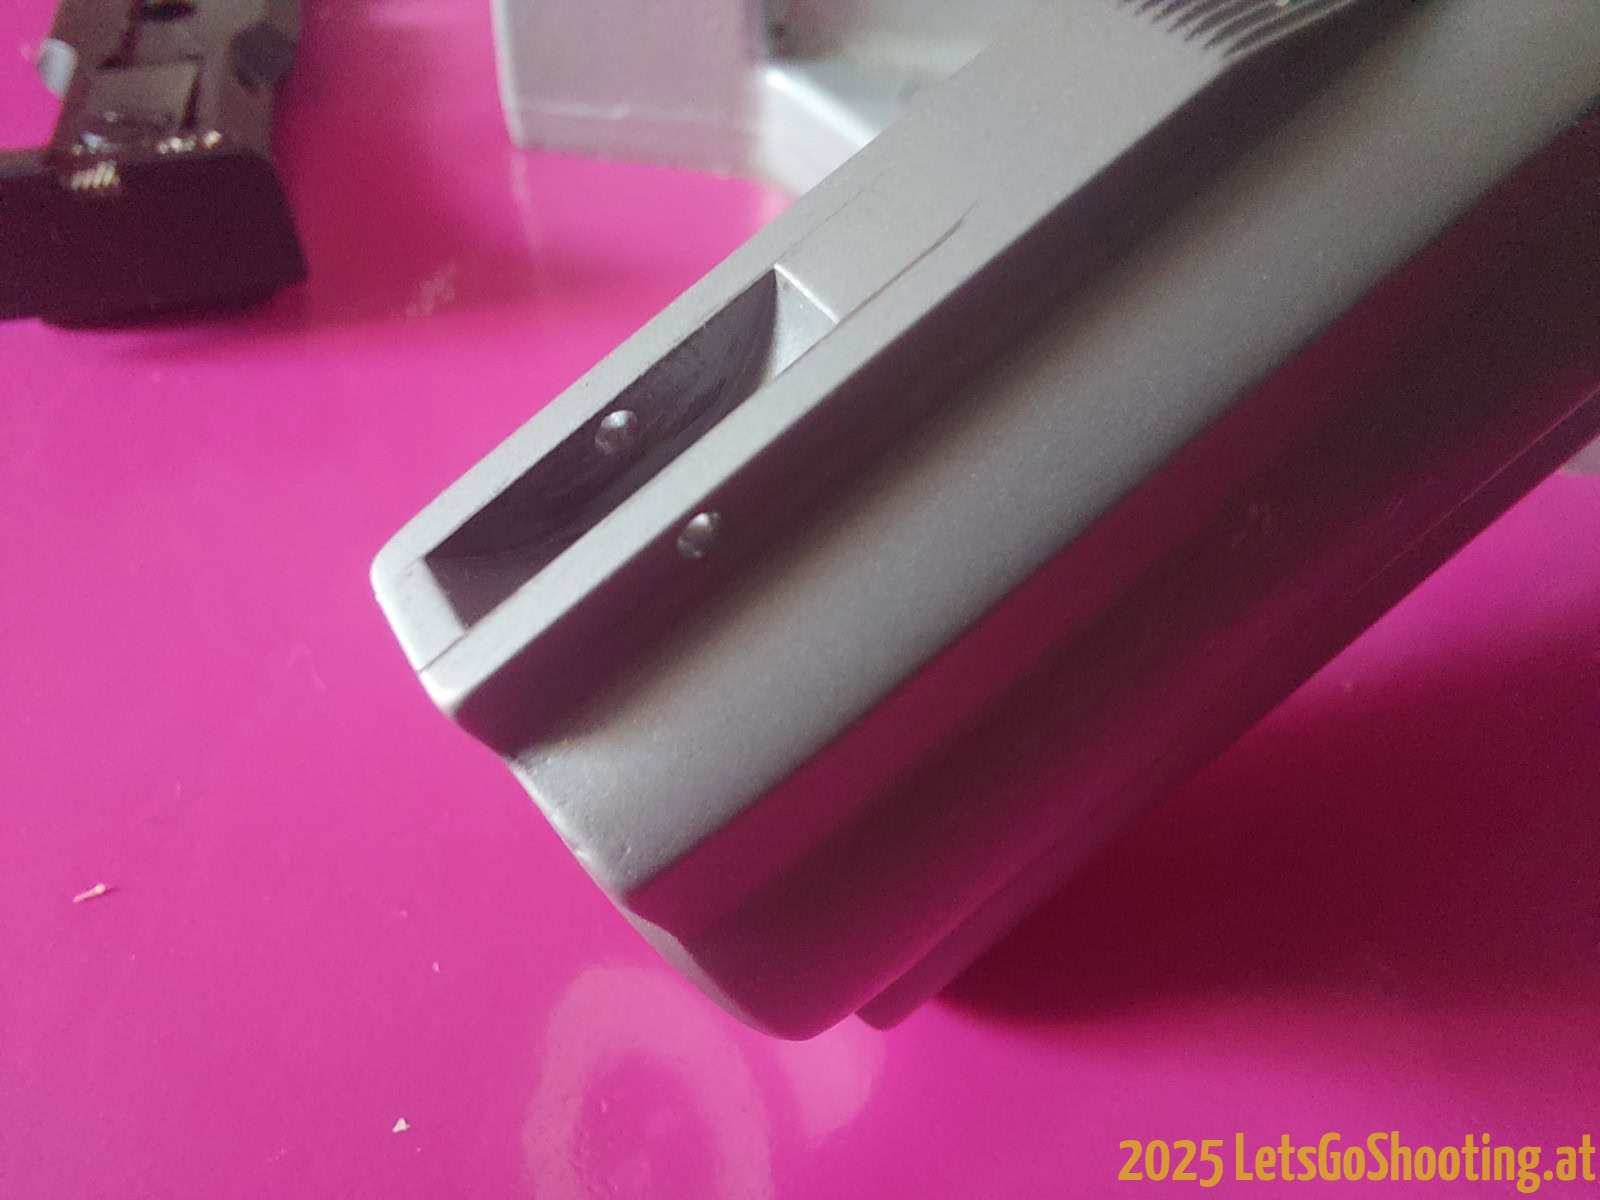
and now the Smith & Wesson 686 Target Champion rear sight
To change the rear sight it is only necessary to remove 2 screws. Screw down the new rear sight ( I got a rear sight with the option to mount a red dot, that’s why I changed it – if you don’t need a red dot, leave the original rear sight on the gun )


As a precaution, I finally secured the screws with Loctite blue – so I am on the safe side, I guess 😉
Last, but not least; the fun part!
Because I do mostly precision shooting at 25m distance, I zeroed the sights to my needs ( how smart 😉 )
I lowered the rear sight as low as I can, then a few clicks up – ready to go – click up / down / left / right until your’re satisfied with your result … Enjoy!


Bitte um Bekanntgabe der Kornhöhe um auf Fleck zu schießen.
mit einem 7,0 / 7.1mm Korn bist Du dabei